The Art of Kefir Making is Simple and Very Rewarding
Kefir making and the resulting probiotic benefits of kefir is simple, inexpensive and extremely rewarding.
Making kefir is an art, not an exact science. The process of making kefir is very simple, but there are a few rules to follow.
Instructions for Kefir Making Using Kefir Grains
To make about 1 cup of kefir:
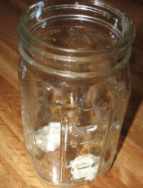
1. Place about 1 tablespoon of kefir grains into a clean glass jar. Kefir grains can be bought from other kefir makers.
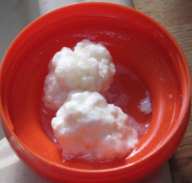
The picture of kefir grains below is for illustration as to what kefir grains actually looks like and is obviously more than a tablespoon.
 2. Pour
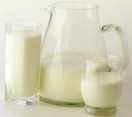
1 cup of fresh milk over them. Most any type of milk is fine--from
pasteurized skim milk to whole milk or even soy milk.
2. Pour
1 cup of fresh milk over them. Most any type of milk is fine--from
pasteurized skim milk to whole milk or even soy milk.
If your kefir is too sour, use more milk. You may need to adjust the ratio of grains to milk depending on how you prefer your kefir. Go by the taste and adjust it until your kefir is the way you like it.

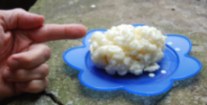
In a week or two, you will notice that your kefir grains have grown. Below is a picture of a one of Bill's huge kefir grains.
Instructions for Kefir Making Using a Kefir Starter
Simply follow the instructions on the box. Kefir starter does do the job, but for superior probiotic and nutritional benefits, the kefir grains are preferred. No matter which method you use, pay attention to the tips below.Kefir Tips
Kefir can be made with most any type of milk. However the kefir grains do not grow well using ultra-pasteurized milk. Most kefir enthusiasts agree that raw, unpasteurized milk seems to yield the best tasting kefir.Kefir also be made using nut milks such as soy, almond, coconut etc. However the kefir grains will not grow in non mammal milk. If you prefer your kefir from vegetable "milk", after a few weeks place your kefir grains back into regular milk for a few days just to give them a break. For more information on using soy milk to make kefir, check out the portion on Dominic Anfiteatro's expansive kefir site.
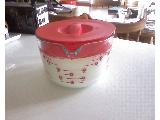
Use a glass jar to contain the culture and store your kefir. Kefir grains will react with stainless steel if there is prolonged contact.
Making kefir is based on temperature, time and the ratios of grains (or starter) to milk. Kefir can be made at any temperature between 40 to 85 degrees Fahrenheit. The cooler your home is, the slower the kefir will grow.
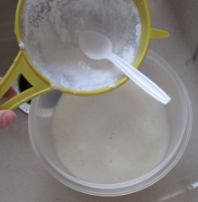
Depending on how tart you prefer your kefir, vary the amount of milk. The more milk you use, the milder your kefir will be. When the kefir is is done fermenting, the milk in the jar will have been completely coagulated. If you try to swirl the milk in the jar and it does not swirl, your kefir is done and ready to be strained.
Never allow your kefir grains to come in contact with chlorinated water. When you wash your kefir-making jars, dry them thoroughly before adding the grains and milk.
Make sure your jars, strainer and any other utensils are both clean and dry before you use them to make kefir.
Storing Kefir Grains
If you need to store your kefir grains, you can refrigerate them for up to two weeks at a time. But make sure that they have plenty of milk. Milk is their food and you don't want to starve them!When you start to use the refrigerated grains, they will have an adjustment period after being in the refrigerator since the cold temperatures will put them out of balance for a few days, so your kefir may be a bit different. Just follow the instructions above and in a few days your kefir will be fine again.
For More Information on How to Make Kefir at Home
If you need to buy kefir grains, have questions, want to share your experiences, need more kefir recipes or anything else kefir-related, I highly recommend the friendly Yahoo group, Good Kefir Grains.Using Kefir
Once you have started your kefir making, there are several ways to enjoy it. Perhaps the most popular way to enjoy kefir is to make a kefir smoothie. Put a cup of kefir, a cup of your favorite fresh or frozen fruit, a dash of cinnamon and a bit of sugar or natural sweetener into a blender, process until smooth and enjoy! You can add some granola or ground flax seeds to your finished kefir smoothie for extra crunch and/or nutrition. For more kefir recipes, follow this link.Go
From Kefir Making to Health Benefits of Probiotics
Go
From Kefir Making to HOME of Wellness With Natural Health Supplements


